Sunday, 15 April 2018

Scatter Terrain

This week I got a few pieces of scatter terrain painted. Two of them are more pieces of Warlord Games' resin Warehouse Set 1.  One is a set of Plastruct O Scale trusses cut up and glued together in a pile; another is simply a pile of wooden beams made from 1/4 square balsa wood.

The Warehouse set is very nice. The sculpting and casting are very good. There is a little bit of resin flash in the recesses and the twine is lost in a couple of places but still very nice once painted.

I really like the Plastuct (and Evergreen too) products. O scale is listed as 1/48  on their website so a little over-sized for 28mm figures. However, in cases like this where it is just scatter terrain it isn't that noticable. Had I slightly smaller trusses I would have chosen them over these. As they got left behind and have suffered through a couple of rainy seasons, the rust has set right in.

The lumber was dead simple: cut 1/4 balsa; scribe grain with sculpting tool; glue together; prime and paint. 

I still have two more pieces coming in the post; once on they are on the table it may be crowded enough  and there will be no need for more shrubs.


Sunday, 8 April 2018

Not so much progress this past week however the runway itself is painted. Really, this should have been done before I textured and flocked the rest of the table but oh well- I got carried away. Although I am happy enough with the end result, I am not entirely satisfied. The pavement is not 'warm' enough to my liking and the cracks in it are not quite realistic enough; something about the pattern I didn't quite get right.

I used a sculpting tool to scribe the edges and the cracks and a stiff plastic brush to add faint lines to the foam surface:

After a base coat of light grey primer, I sponged on some Americana Shale Green and some Mississippi Mud, followed by a wash of black and then a light grey dry brush.

To finish off I added some 10mm Heki Autumn grass along the edges (as well as more shrubs) and poking through in a few spots in the concrete.


 A model's eye view:
A few more items to be added. I am going to go through my collection of odds and sods and see if there is anything I can use for some scatter terrain: old barrels, pieces of scrap steel, lumber that sort of thing. I also have another structure in the post from Sarissa Precision and resin pick-up from Warlord that will get turned into a derelict vehicle. A few 60mm bases with taller shrubs/small tress might also find their way onto this table.

Sunday, 1 April 2018

Airstrip nearly Done

 The best part of my spare time over the last two weekends has the table surface nearly complete; all that remains to be done is the pavements for the landing strip. What follows is a series of step-by-step photos of the progress.

I decided I wanted some slight variations in the ground; to achieve this I glued down torn pieces of cork mat, approximately 3mm thick:

I etched out the edge of the runway, effectively creating a small ditch around the edge. In retrospect I should have raised the runway to create the delineation between it and the surrounding grass land instead. I think the end result would have been more realistic.
I mixed a full tube (300ml) of sanded grout caulking with approximately 200ml of tile adhesive and covered everything except the runway with it to blend in the cork pieces and create texture. While this was still wet I pushed Woodland Scenics Coarse Talus into the mixture and generously sprinkled coarse sand mixed with finer talus over top:


After 24 hours I then coated the sand and gravel with two different coloured water/paint/glue mixtures: Desert Sand and Burnt Umber. I wanted some of the different colours of the stones to come through so the coating was mostly glue and water with just enough paint to "stain" the surface:

Next up I went over the  table with some 2mm Light Green static grass, leaving some patches bald:

Next stage was the fun one: placing bushes and scrub. I concentrated them around the rocks and edges of the table and the runway. They are a combination of Woodland Scenics medium green Clump Foliage, Light green Clump Foliage and Light Green Lichen (as some of it is more grey than green, it is great for representing dead wood):


 I made good use of my collection of tufts for this stage. Leadbears Desert Tufts, Gamers Grass Brown, and Army Painter Jungle tufts.

 The final stage was one more layer of static grass: Heki 6mm Autumn (one of my favourites).


I am happy with the end result; I was going for knee high grass and brush. I plan a few scatter bases with slightly taller shrubs on them to add to the variation.

Over the next week I will 'pave' the runway and start on a few pieces of scatter terrain.

Sunday, 25 March 2018

Start on a third Pulp Alley table

The next feature I have for the airstrip is a Novus Design Studio fuel tank. The tank itself is cast from resin and for the most part was perfect; just a couple of small air bubbles that I chose to ignore as they weren't conspicuous. I sprayed grey primer then a white over coat. The ends and cap were painted with Scale 75 Irati Green (just because I wanted to try it). Weathering was done with a combination of Golden High Flow Acylic Burnt Umber, Raw Sienna, Neutral Grey and Americana Charcoal and Umber thinned with Golden Glaze Medium and water. I went a bit nuts collecting grass tufts and as I have quite a bit of Gamers Grass Beige and Burnt tufts I used a bunch of them instead of static grass.


Here is a photo of the basic layout so far. The plan is to have a fairly open table; perhaps one other building and lots of scrub brush. I will also add some discarded fuel cans and a few empty boxes or crates

Monday, 19 March 2018

Trumpeter's Salute 2018

The event that drove this project has come and gone: Trumpeter's Salute. This was my fist Wargames Convention. I had attended a couple of Games Workshop events with my son and his friends back in the oughties as well as 4 Astro-nomicon tournaments that I really enjoyed. It was great to see such a variety of events and Pulp Alley was well  represented with David running two games on our tables and LAF's Wirelizard running three (I think...) on his table. Here are a few pictures from the Saturday games as well as a link to an Imgur album at the bottom with many more.

First off the 4 pictures from our games. Pulp Alley proved to be popular; we had 7 players around a 3x3 table for our first game and 5 for our second. Wirelizard's table was also crowded with similar numbers. Here David takes control of the game:

After the claustrophobic urban table we reduced the terrain for The Perilous Island.


David was awesome- entertaining, keeping the game rolling and energetic for all 8 hours of play(!!!)

Wirelizard's game shows how versatile the rule set is. His game was set in 17thC England and had Parlimentarians and Royalists sniffing around the tiny town of Dwmchurch-on-fen (never heard of it? I think it sank...).  The game looked really good; awesome terrain and fish people crawling all over the place. I should have got a couple of pics of the minis but I was trying not to be intrusive as people played.


As seems obligatory, here is a picture of the "loot" I collected. This is all stuff that I would normally have to buy online and cover shipping; furthermore there was a show discount that virtually wiped out the tax. The LoTR stuff on the right I bought at the Bring and Buy and the whole lot cost $70CDN- quite a bargoon.

There is about 40 more pictures in this Imgur album. If I could do it all again I would have concentrated on a few tables and taken lots of pictures, and kept track of the action so I could offer a bit more info than what I was able to collect.

Friday, 16 March 2018

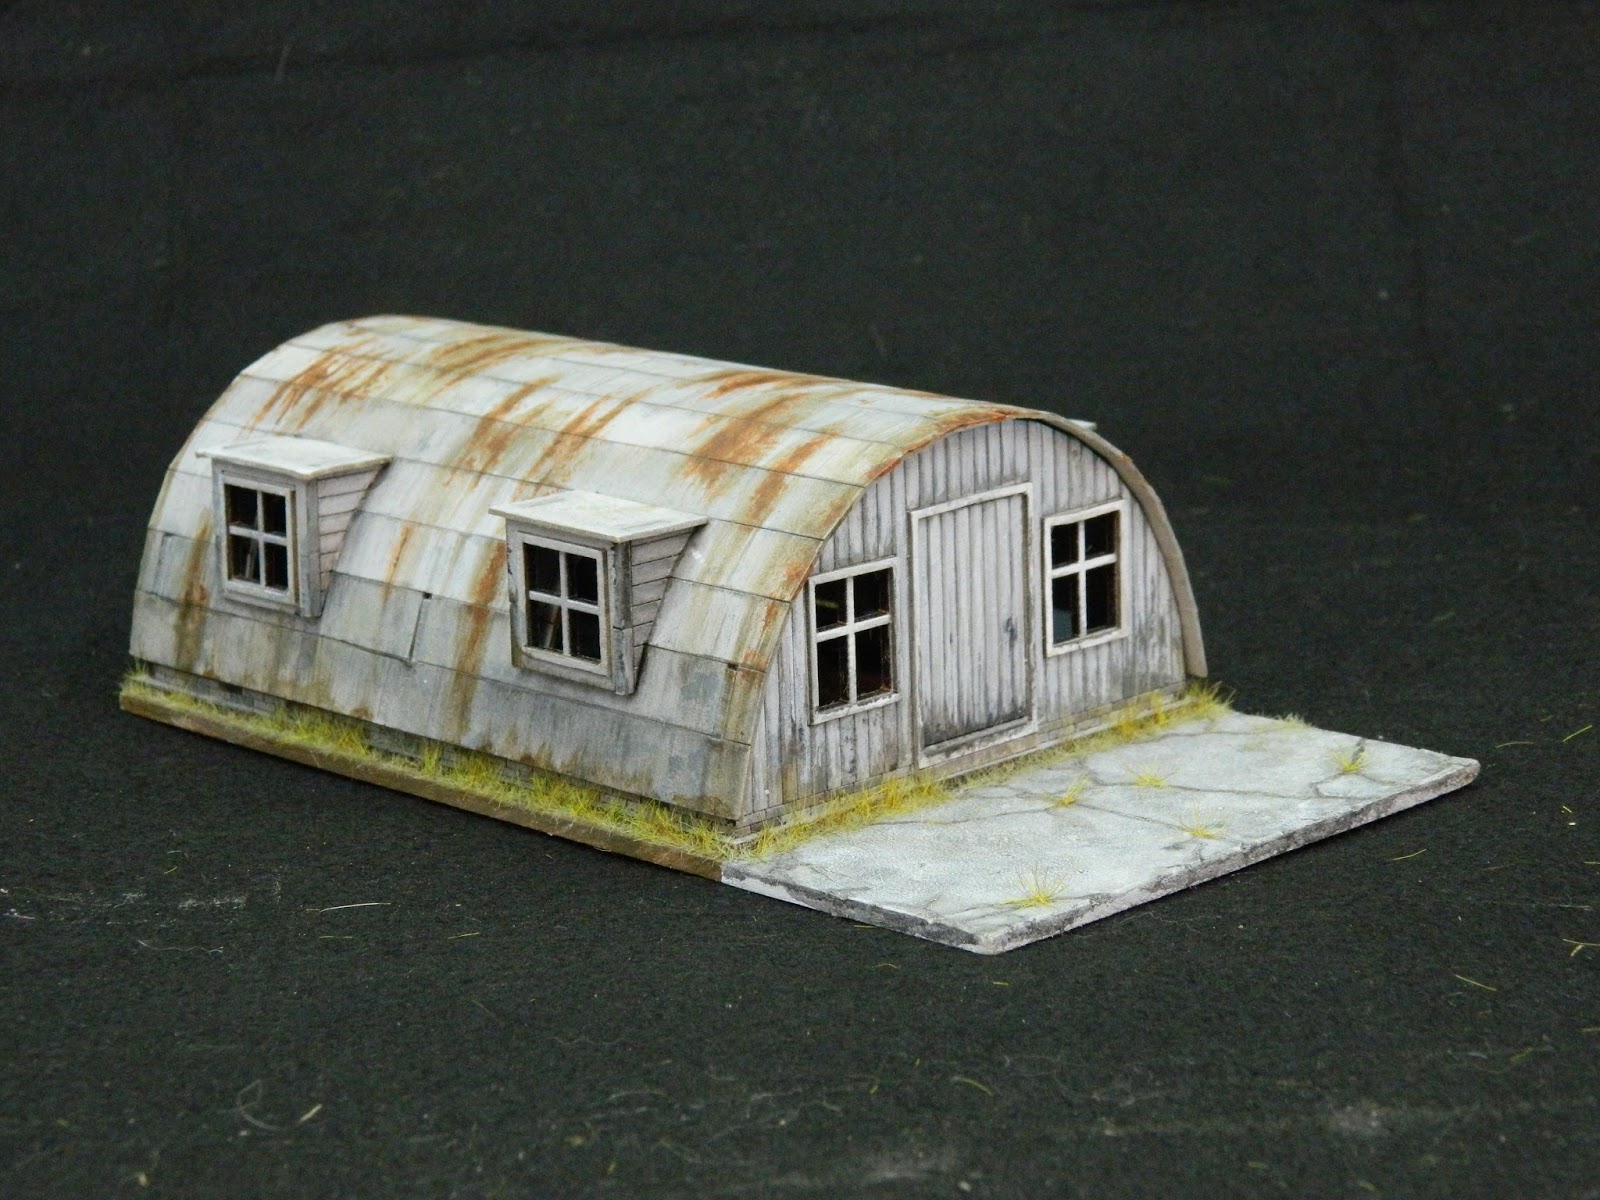
Sarissa Precision Nissen Hut

Since the water table is giving me head aches I have decided to flip it over and make a remote, ill-maintained airstrip on the other. Nothing too fancy: a couple of buildings and a derelict runway. First up is a Sarissa Precision Quonset/Nissen hut.
Although a smidge on the small side, as you can see in the Sarissa photo above, it is a simple but effective kit and comes at a reasonable price. The horizontal lines allow the card roof to bend but most Quonset huts have corrugated roofing with the ribs running vertically. Judging  by photos I have found this roofing was layered so that in effect you do have horizontally running lines.
If I wasn't so anxious to get painting this unit, I could have glued Evergreen or Plastruct corrugated roofing in strips following the horizontal lines and it would have been much more realistic. In the end though I really wanted to try out some new brushes and high flow acrylics, so... here it is:


In other news... Trumpeter's Salute! The jungle and urban tables are all ready to get loaded into the pickup; I head out the door in about an hour and 15.