Sunday, 18 February 2018

Water Works

Not much to show this week. I have spent a lot time working on a water board that I am not dissatisfied with. I have started and quit on it three times now. I did manage to get my resin water poured for the jungle table and make a little waterfall; it is removable so the secret cave entrance can be revealed.

The ocean water is Fibre-Tek Crystal Clear Casting Resin. As it was my first time using casting resin I made some mistakes, the big one being pouring too thick. I should have done 4 or 5 thin pours instead of 2 thicker ones. This resulted in bubbles which were also the result of air trapped in the foam foliage I used for seaweed. The product itself is quite viscous so it doesn't run over the surface into all the nooks and crannies; this also makes doing thin pours a little more challenging. In the end the result is acceptable and I will know better next time. For the record, cost wise it is better value than Gloss Hodge Podge, better represents water but is trickier to use and is flammable and toxic.
  As I poured the resin too thick (I may have also used too much hardening agent), when it dried it retracted and pulled up a bit where it met the shoreline. I dabbed white tub and tile caulk to create the crests of gently breaking waves.

For the waterfall I used a piece of clear plastic as a base; smeared a layer of clear silicone caulking, scribing lines in it as it dried.After the silicone set I used the same tub and tile caulk as before and dabbed it over top to represent white water and foam.

 Seemed like a good time to take another shot of the whole table...
I have a Sarissa Precision south seas hut I could put together for the table but as it stands there is already quite a bit of terrain on it. I may yet make it. I was going to make a stone idol as well, possibly as a plot point, but David already has several plot points lined up that are smaller and therefore would take up less space on an already crowded table.

Sunday, 11 February 2018

Bits and Bobs and The Table As It Stands

The last few pieces designated specifically for this table are done. I still have a few items in the post that I hope will get here in time for Trumpeter's Salute: manhole covers, pallets, trash cans and  a few other small pieces.

This is 3 pieces of Warlord Games' Warehouse Set 1:
The lamposts I bought off ebay:

As you can see in the photo above the pavements have also been painted a little city 'debris' added. 

At this point I thought I would indulge myself and put everything on the table.


 Once we get the vehicles on there it is going to be really dense; we may have to remove a building so we have some place to put the miniatures but I figure it's better to remove excess terrain than to wish you had more.


Sunday, 4 February 2018

Hedges, grass and the odd shrub

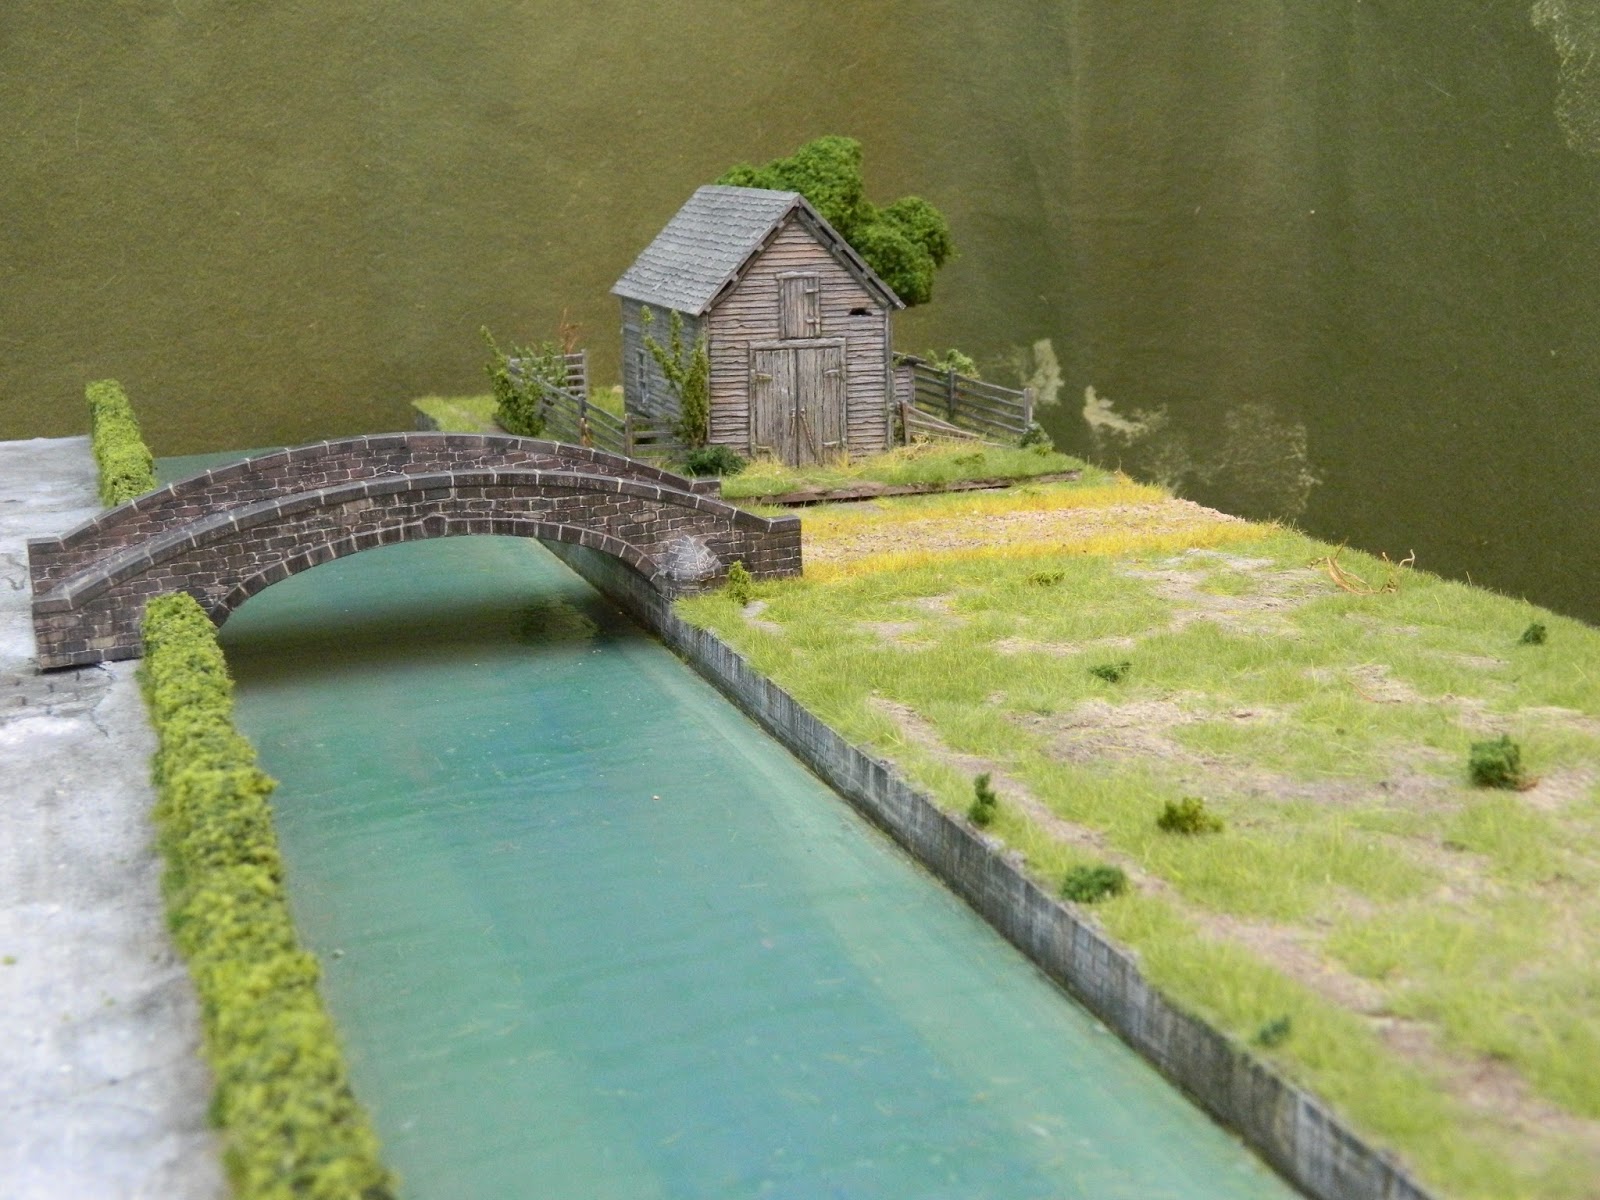
Some small progress over the last week: hedges made for the urban side to keep small children and stray dogs from falling in the canal and the rural side has been done up with flock, static grass and gravel. Originally I was going to put another building across the gravel road from the barn but now I am not so sure; I like the vacant lot look and as the other side of the canal has plenty of buildings I don't think the table needs another. I am considering discarded wood, fence posts and debris or supplies to represent the next stage in the urban development as it expands across the canal- pallets, crates, lumber, etc.


Monday, 29 January 2018

Bridge and Barn Painted

The Italeri/Warlord Games bridge is done. Although not really appropriate for the table it is the only bridge I have and, more importantly, is the correct span. As the table represents a portion of town on the border between rural and urban, a bridge that is a little less decorative would be better. However, perusing the internet for something that would do is yielding unsatisfactory results; in most instances the span is wrong. Bridges for wargames tend to be a bit short and bridges for model railways are generally long and narrow. If- and this seems unlikely- I have time, I may make a simpler one from scratch.


I have also completed the base for Renedra's Ramshackle Barn. The fencing is their 5 rail plastic fence and the tree is Woodland Scenics. The flocking is mostly Silifor 4mm summer grass, War World 6mm autumn grass and some Heki XL 10mm herbst. Bits and bobs of Woodland Scenics clump foliage and flocked wire shrubs are dotted here and there.


Sunday, 21 January 2018

Last 2 Buildings Painted

I have finished painting and detailing the last 2 MDF structures: Sarissa's Precision's CityBlock Corner Store and CityBlock Shop (with extra floor). If  time allows I think I will go back and paint the the window and door frames in different colours. There are a few more bits of signage that may make it onto the buildings but at this point I am pleased with them.
Sadly, most of the decals I bought off ebay turned out not to be waterslide transfers (despite the auction description); in fact, they were not really "decals" at all. They look great, but I had to cut them out and glue them onto the buildings- not as nice as transfers.
(new 3000 lumen work light makes it look like a bright sun-shiney day!)
The A&P supermarket:


Generic variety store (sadly, no name...):
 Quality candy...
 and cheap smokes!

Most of the table details haven't arrived yet. In fact, I just received notice that an order I placed before Christmas was just shipped earlier this week...


Monday, 15 January 2018

Three Buildings Painted

The buildings of one city block are done- all that is needed to finish them off is basing.  The buildings were base coated with Rustoleum spray primer. I wouldn't use it again as the MDF soaked it up big time; it took several coats. Other sprays seem to fair better. Paint was craft paint from the Cermacoat and Americana ranges, thinned with either Golden Glazing Liquid/H2O or Acrylic Flow Release/H2O depending on application. The buildings were then hit with a thinned dark wash to blend the colours together a bit and bring out the recesses that filled with paint. The decals come from eBay seller largemouthlodge.


Sunday, 7 January 2018

Jan. 7th update: painted canal walls; progress on the rural side of the canal

More work done on the table surface. My favourite "dirt" recipe of Sculptamold and brown paint applied to the rural side of the board, including the barn's base followed by a dry brush of Desert Sand and a diluted black wash:


The stone work along the sides of the canal are also done now. The textured sheet is  Plas Craft Games textured stone sheet. The edges of the stone are a little soft which means inking and heavy handed drybrushing do not result in good contrast: some care has to be taken otherwise the definition gets blurred. 


The rest of my time has been taken up with priming some of the building features that haven't been painted yet: stairs and awnings for the two shops. Our next day of play testing scenarios is February 17th. After that is Trumpeter's Salute in March.